
This series will develop a locally-hosted WebXR gallery experience using Babylonjs. Each entry concludes in a progressively more detailed WebXR gallery that you can access in your headset’s browser.
You’ll need both a desktop/laptop computer and a WebXR-enabled headset, which in December of 2020 means a desktop VR rig or an Oculus Quest.
Here’s what we’ll undertake in each entry.
- Get an HTTPS-enabled local server running and serving a Hello XR Gallery World gallery environment to your headset.
- Parse your gallery’s local file hierarchy and create browsable media collections in the WebXR gallery environment.
- Upgrade the gallery server to Rails and enable thumbnail creation, exhibition customization, and more.
- Add in-experience customization and curation tools.
Install the Web Server and Proxy
You’ll need a Mac or Windows desktop/laptop to develop and serve your WebXR gallery. We’ll be installing needed developer tools via your computer’s terminal application.
WebXR allows the delivery of virtual and augmented reality apps/experiences using the internet and web browsers. Due to the intrinsically very personal nature of the data captured by XR headsets, the WebXR standard requires the use of encrypted HTTPS.
In this entry, we’ll get HTTPS working using the open-source local-web-server and localtunnel software projects, allowing us to host and serve our WebXR app locally. The local-web-server and localtunnel projects are available via NPM, or Node Package Manager, accessed via terminal. In your terminal, check if npm is installed with:
npm -v
You’ll get the version number if it’s installed and an error message if not. If needed, you can download Node and npm here: https://nodejs.org
With npm installed, install local-web-server and localtunnel:
npm install -g local-web-server
npm install -g localtunnel
That’s all we need for external tool downloads. If both tools are installed without error, you’re ready for the HTML and javascript files that define the WebXR experience.
Download Babylonjs WebXR Code
Babylonjs is a javascript WebGL framework with extensive and up-to-date WebXR support. Babylonjs’ deep functionality is well documented, and the project’s in-browser Playground makes it especially discoverable. Importantly, all Playground examples can be downloaded, served locally, and viewed on your headset with no code changes. We’ll use this download feature to get started quickly.
I’ve created a “Radial Gallery” template as a Playground. Download the complete (and very simple) project by visiting https://playground.babylonjs.com/#JYTGY1 and clicking the download button.

A zipped archive of the Playground project will quickly download, and the unzipped project’s root folder will serve as the root of our local webserver. We now have everything required to develop a web-delivered VR gallery locally.
Launch the Server and Start the Proxy
Before we start customizing the gallery, we’ll launch the server, start the proxy, confirm functionality in a desktop browser, and finally load the Playground on your headset with your chosen HTTPS URL.
Move the unzipped Playground folder to a long-term project location (not your desktop or download folders). In your terminal, navigate inside the Playground directory, and launch local-web-server from your terminal with:
ws
That’s it, just “ws.” This command starts the webserver, which responds with a local, HTTP-based URL. You can load this URL in your desktop browser, but it’s HTTP and not HTTPS and won’t work in your headset for WebXR.
To get an HTTPS address, we use localtunnel. The localtunnel project provides an HTTPS proxy to your local web server. The HTTPS address it provides can be sent to anyone to view in their headset, making it possible for friends and families to share private WebXR galleries at no cost.
You’ll be typing the localtunnel-provided URL into the headset’s browser, so it’s a good idea to use localtunnel’s custom subdomain option, enabling easier remembering, sharing, and VR-typing.
In the following command, “XR-2020” is the custom domain, which you must change. Be creative, or it may take a couple of tries to get an available domain.
lt --port 8000 --subdomain XR-2020
After successfully running the command, you’ll get an HTTPS-based URL that will load in your headset browser. The URL for the example above is “https://XR-2020.loca.lt”. Verify it’s working by loading the provided URL into your desktop browser. The localtunnel intro page should load (you only see this once). Click continue, and the downloaded Playground should display.
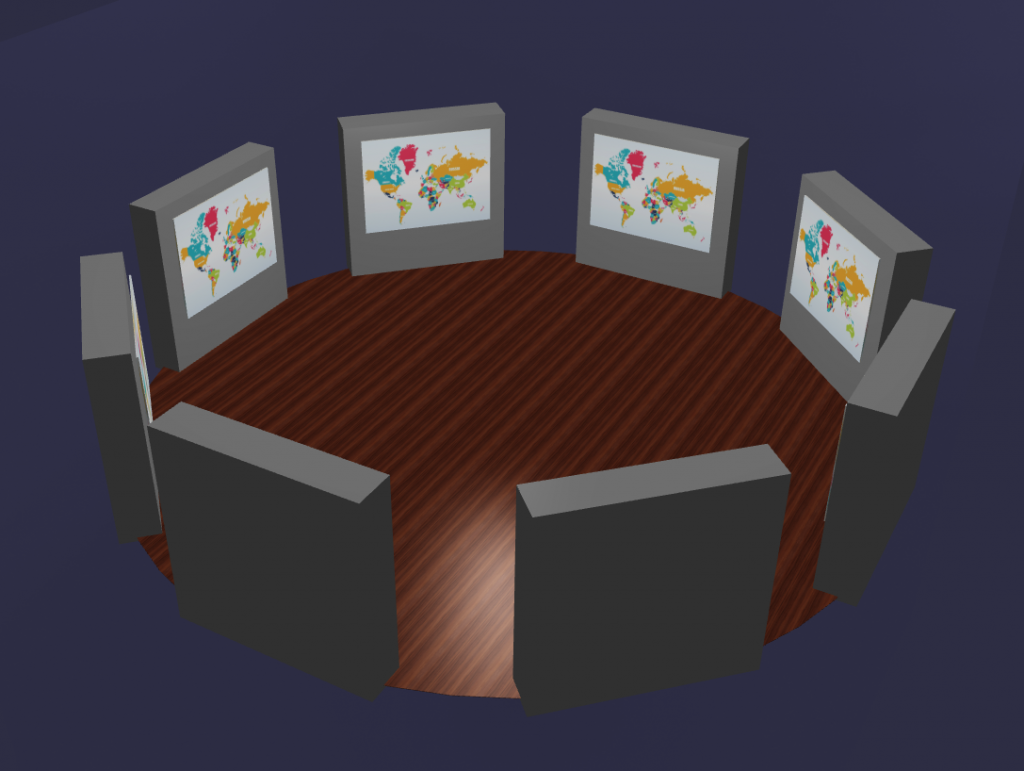
Now put in your headset, open the browser, and type in your custom URL. I suggest immediately bookmarking the URL as you’ll be coming here often. WebXR experiences do not auto-start, so after the page loads, look for a headset icon in the bottom-right and “click” it with your motion controller. You’ll be taken into a radial gallery with six identical maps of the world.
Customize the Hello WebXR Gallery World
The map is from the pre-defined collection of textures available for Playground experimentation. Let’s replace the map with a collection of your photos, sequentially named. We’ll update the HTML/javascript code you downloaded to load this new collection. If you don’t already have a preferred code editor, the free Atom editor is a good option.
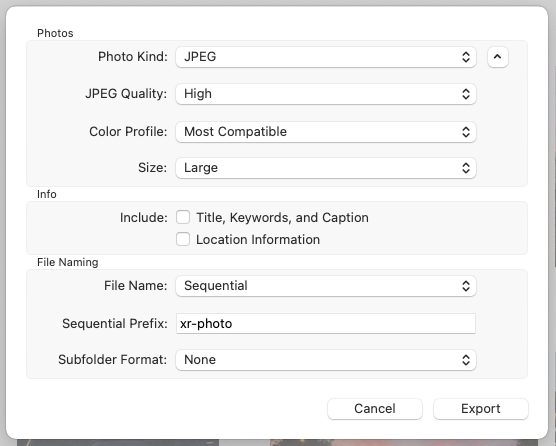
First, create a small collection of your own landscape-oriented photos, four to ten total (in later steps, we’ll do the work required to support collections of any size and orientation). All photo managers offer export options that will output a photo collection with reduced size and sequential naming.
Lowering image resolution is important. Modern cameras/phones take photos at far greater detail than headsets can resolve, thus consuming GPU resources without benefit.
Export your collection into a new “photos” folder within the “hello-xr-gallery-world” folder. The most important detail is that photos are named sequentially. “photo-1.jpg”, “photo-2.jpg”, etc.
Next, open “index.html” in your code editor. Search for “addSimpleRadialGallery,” the name of the function that adds the gallery to the scene.
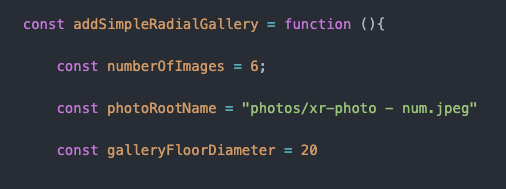
The function begins with the variables you need to change.
- Change numberOfImages to the amount of photos you added.
- Change photoRootName to the name of your photo folder and image sequence name, replacing the sequence number with “num”.
- galleryFloorDiameter can be changed to expand the gallery size.
Looking further down in within the “addSimpleRadialGallery” function find the reference to the unwanted map texture. Comment the map textureFileName line with two forward slashes, and remove the slashes in front of the following line, like so:

That’s all the code changes. Save your changes and reload the gallery page in your desktop browser and confirm your changes. If you’re new to web programming, the one detail that may cause problems is getting the photo path and sequential naming correct.
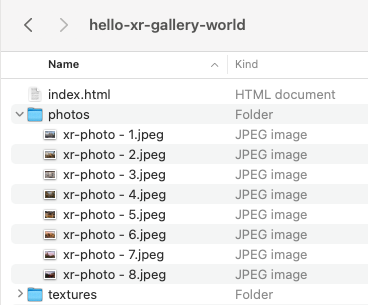
If you’re having problems, compare your project folder to this screenshot, and make sure your changes to the photoRootName match your folder and file names.
Check that everything is working correctly in your desktop browser, put on your headset, reload the page, and enjoy your photos in VR.
Coming Up
In the next installment, we’ll add server-side logic to automatically parse collection folders to navigable VR collections and build a more interesting environment for your collections.
In the meantime, explore the Babylonjs docs and expand upon our simple example. The WebXR section includes a very detailed gallery example you can explore.