
*This article was modeled from the current Adobe React SPA documentation.
Create a Custom WeatherComponent
Learn how to create a custom weather component to be used with the AEM SPA Editor. Learn how to develop author dialogs and Sling Models to extend the JSON model to populate a custom component. The Open Weather API and Vue Open Weather Widget are used.
Objective
- Understand the role of Sling Models in manipulating the JSON model API provided by AEM.
- Understand how to create new AEM component dialogs.
- Learn to create a custom AEM Component that will be compatible with the SPA editor framework.
What you will build
A simple weather component will be built. This component will be able to be added to the SPA by content authors. Using an AEM dialog, authors can set the location for the weather to be displayed. The implementation of this component illustrates the steps needed to create a net-new AEM component that is compatible with the AEM SPA Editor framework.
Prerequisites
Review the required tooling and instructions for setting up a local development environment. This chapter is a continuation of the Navigation and Routing chapter, however to follow along all you need is a SPA-enabled AEM project deployed to a local AEM instance.
Open Weather API Key
An API key from Open Weather is needed to follow along with the tutorial. Sign up is free for a limited amount of API calls.
Define the AEM Component
An AEM component is defined as a node and properties. In the project these nodes and properties are represented as XML files in the ui.apps module. Next, create the AEM component in the ui.apps module.NOTE
A quick refresher on the basics of AEM components may be helpful.
- In the IDE of your choice open the
ui.appsfolder. - Navigate to
ui.apps/src/main/content/jcr_root/apps/wknd-spa-vue/componentsand create a new folder namedopen-weather. - Create a new file named
.content.xmlbeneath theopen-weatherfolder. Populate theopen-weather/.content.xmlwith the following:
<?xml version="1.0" encoding="UTF-8"?>
<jcr:root xmlns:sling="http://sling.apache.org/jcr/sling/1.0" xmlns:cq="http://www.day.com/jcr/cq/1.0" xmlns:jcr="http://www.jcp.org/jcr/1.0"
          jcr:primaryType="cq:Component"
          jcr:title="Open Weather"
          componentGroup="WKND SPA Vue - Content"/>
jcr:primaryType="cq:Component" – identifies that this node will be an AEM component.
jcr:title is the value that will be displayed to Content Authors and the componentGroup determines the grouping of components in the authoring UI.
- Beneath the
custom-componentfolder, create another folder named_cq_dialog. - Beneath the
_cq_dialogfolder create a new file named.content.xmland populate it with the following:
<?xml version="1.0" encoding="UTF-8"?>
<jcr:root xmlns:sling="http://sling.apache.org/jcr/sling/1.0" xmlns:granite="http://www.adobe.com/jcr/granite/1.0" xmlns:cq="http://www.day.com/jcr/cq/1.0" xmlns:jcr="http://www.jcp.org/jcr/1.0" xmlns:nt="http://www.jcp.org/jcr/nt/1.0"
          jcr:primaryType="nt:unstructured"
          jcr:title="Open Weather"
          sling:resourceType="cq/gui/components/authoring/dialog">
    <content
            jcr:primaryType="nt:unstructured"
            sling:resourceType="granite/ui/components/coral/foundation/container">
        <items jcr:primaryType="nt:unstructured">
            <tabs
                    jcr:primaryType="nt:unstructured"
                    sling:resourceType="granite/ui/components/coral/foundation/tabs"
                    maximized="{Boolean}true">
                <items jcr:primaryType="nt:unstructured">
                    <properties
                            jcr:primaryType="nt:unstructured"
                            jcr:title="Properties"
                            sling:resourceType="granite/ui/components/coral/foundation/container"
                            margin="{Boolean}true">
                        <items jcr:primaryType="nt:unstructured">
                            <columns
                                    jcr:primaryType="nt:unstructured"
                                    sling:resourceType="granite/ui/components/coral/foundation/fixedcolumns"
                                    margin="{Boolean}true">
                                <items jcr:primaryType="nt:unstructured">
                                    <column
                                            jcr:primaryType="nt:unstructured"
                                            sling:resourceType="granite/ui/components/coral/foundation/container">
                                        <items jcr:primaryType="nt:unstructured">
                                            <label
                                                    jcr:primaryType="nt:unstructured"
                                                    sling:resourceType="granite/ui/components/coral/foundation/form/textfield"
                                                    fieldDescription="The label to display for the component"
                                                    fieldLabel="Label"
                                                    name="./label"/>
                                        </items>
                                    </column>
                                </items>
                            </columns>
                        </items>
                    </properties>
                </items>
            </tabs>
        </items>
    </content>
</jcr:root>
The above XML file generates a very simple dialog for the Weather Component. The critical part of the file is the inner <label>. This dialog will contain a textfield that will allow a user to configure the weather to be displayed.
A Sling Model will be created next to expose the value of the label properties via the JSON model.
You can view a lot more examples of dialogs by viewing the Core Component definitions. You can also view additional form fields, like select, textarea, pathfield, available beneath /libs/granite/ui/components/coral/foundation/form in CRXDE-Lite.
With a traditional AEM component, an HTL script is typically required. Since the SPA will render the component, no HTL script is needed.
Create the Sling Model
Sling Models are annotation driven Java “POJO’s” (Plain Old Java Objects) that facilitate the mapping of data from the JCR to Java variables. Sling Models typically function to encapsulate complex server-side business logic for AEM Components.
In the context of the SPA Editor, Sling Models expose a component’s content through the JSON model through a feature using the Sling Model Exporter.
- In the IDE of your choice open the
coremodule ataem-guides-wknd-spa-vue/core. - Create a file named at
OpenWeatherModel.javaatcore/src/main/java/com/adobe/aem/guides/wknd/spa/vue/core/models. - Populate
OpenWeatherModel.javawith the following:
package com.adobe.aem.guides.wknd.spa.vue.core.models;

import com.adobe.cq.export.json.ComponentExporter;

// Sling Models intended to be used with SPA Editor must extend ComponentExporter interface
public interface OpenWeatherModel extends ComponentExporter {

    public String getLabel();

}
- This is the Java interface for our component. In order for our Sling Model to be compatible with the SPA Editor framework it must extend the
ComponentExporterclass. - Create a folder named
implbeneathcore/src/main/java/com/adobe/aem/guides/wknd/spa/vue/core/models. - Create a file named
OpenWeatherModelImpl.javabeneathimpland populate with the following:
package com.adobe.aem.guides.wknd.spa.vue.core.models.impl;

import org.apache.sling.models.annotations.*;
import org.apache.sling.models.annotations.injectorspecific.ValueMapValue;
import com.adobe.cq.export.json.ComponentExporter;
import com.adobe.cq.export.json.ExporterConstants;
import org.apache.commons.lang3.StringUtils;
import org.apache.sling.api.SlingHttpServletRequest;
import com.adobe.aem.guides.wknd.spa.vue.core.models.OpenWeatherModel;

// Sling Model annotation
@Model(
        adaptables = SlingHttpServletRequest.class,
        adapters = { OpenWeatherModel.class, ComponentExporter.class },
        resourceType = OpenWeatherModelImpl.RESOURCE_TYPE,
        defaultInjectionStrategy = DefaultInjectionStrategy.OPTIONAL
)
@Exporter( //Exporter annotation that serializes the modoel as JSON
        name = ExporterConstants.SLING_MODEL_EXPORTER_NAME,
        extensions = ExporterConstants.SLING_MODEL_EXTENSION
)
public class OpenWeatherModelImpl implements OpenWeatherModel {

    @ValueMapValue
    private String label; //maps variable to jcr property named "label" persisted by Dialog

    // points to AEM component definition in ui.apps
    static final String RESOURCE_TYPE = "wknd-spa-vue/components/open-weather";

    // public getter method to expose value of private variable `label`
    // adds additional logic to default the label to "(Default)" if not set.
    @Override
    public String getLabel() {
        return StringUtils.isNotBlank(label) ? label : "(Default)";
    }

    // method required by `ComponentExporter` interface
    // exposes a JSON property named `:type` with a value of `wknd-spa-vue/components/open-weather`
    // required to map the JSON export to the SPA component props via the `MapTo`
    @Override
    public String getExportedType() {
        return OpenWeatherModelImpl.RESOURCE_TYPE;
    }
}
The the static variable RESOURCE_TYPE must point to the path in ui.apps of the component. The getExportedType() is used to map the JSON properties to the SPA component via MapTo. @ValueMapValue is an annotation that reads the jcr property saved by the dialog.
Update the SPA
Next, update the Vue code to include the Vue Open Weather Widget and have it map to the AEM component created in the previous steps.
- Install the Vue Open Weather Widget as an npm dependency:
$ cd aem-guides-wknd-spa-vue/ui.frontendnpm install vue-open-weather-widgetCreate a new folder named OpenWeather at ui.frontend/src/components/OpenWeather.
Add a file named OpenWeather.vue and populate it with the following:
<template>
  <div class="weather-widget-container">
    <open-weather-widget :api-key="API_KEY"/>
  </div>
</template>
<script>
// For simplicity it is hard coded in the file, ideally this is extracted in to an environment variable

import OpenWeatherWidget from 'vueOpenWeatherWidget'
import 'vue-open-weather-widget/dist/vue-open-weather-widget.css'

export default {
  name: 'OpenWeather',
  components: {
    OpenWeatherWidget
  }
}
</script>

<style scoped>

</style>
Update map-components.js at ui.frontend/src/components/map-components.js to include the OpenWeather component:
// Open Weather Component Mapping
MapTo('wknd-spa-vue/components/open-weather')(
  OpenWeather,
  {
    emptyLabel: 'Open Weather',
    isEmpty: function (props) {
      return !props || !props.label || props.labek.trim().length < 1
    },
    resourceType: 'wknd-spa-vue/components/open-weather'
  }
)
- Deploy all of the updates to a local AEM environment from the root of the project directory
$ cd aem-guides-wknd-spa-vue$ mvn clean install -PautoInstallSinglePackage
Update the Template Policy
Next, navigate to AEM to verify the updates and allow the OpenWeather component to be added to the SPA.
- Verify the registration of the new Sling Model by navigating to http://localhost:4502/system/console/status-slingmodels.
You should see the above two lines that indicate theOpenWeatherModelImplis associated with thewknd-spa-vue/components/open-weathercomponent and that it is registered via the Sling Model Exporter. - Navigate to the SPA Page Template at http://localhost:4502/editor.html/conf/wknd-spa-vue/settings/wcm/templates/spa-page-template/structure.html.
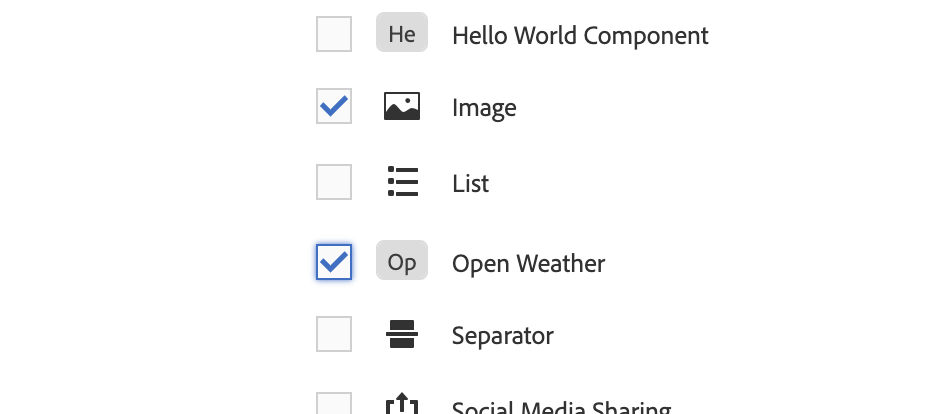
- Update the Layout Container’s policy to add the new
Open Weatheras an allowed component:
Save the changes to the policy.
Author the Open Weather Component
Next, author the Open Weather component using the AEM SPA Editor.
- Navigate to http://localhost:4502/editor.html/content/wknd-spa-vue/us/en/home.html.
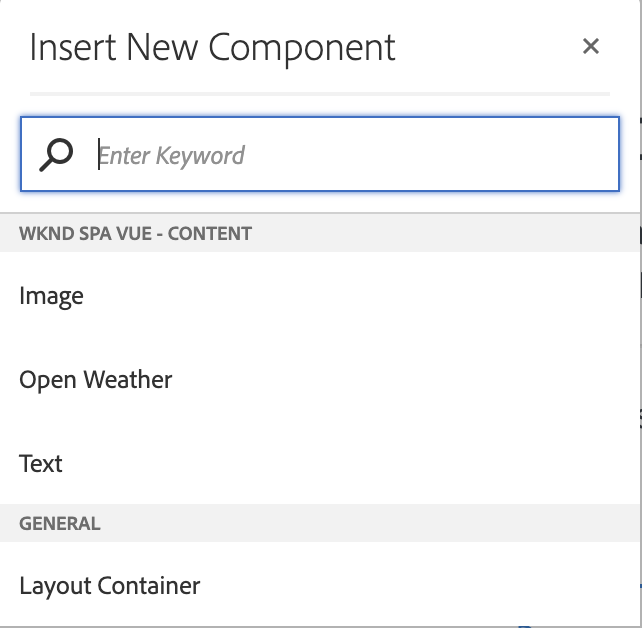
- In
Editmode, add theOpen Weatherto theLayout Container:
Open the component’s dialog and enter a Label.
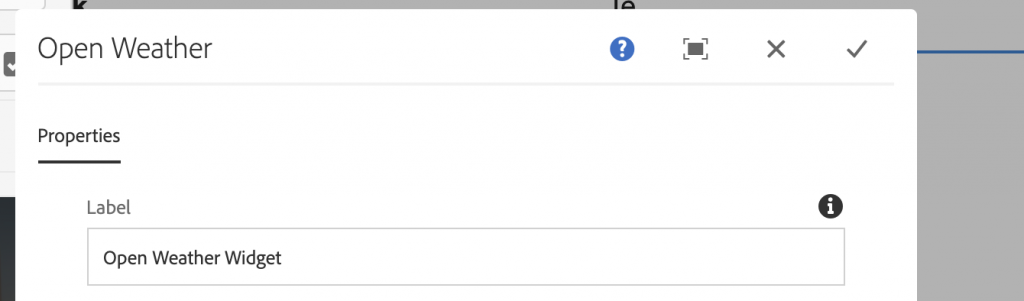
This is the dialog that was created based on the XML file earlier in the chapter.
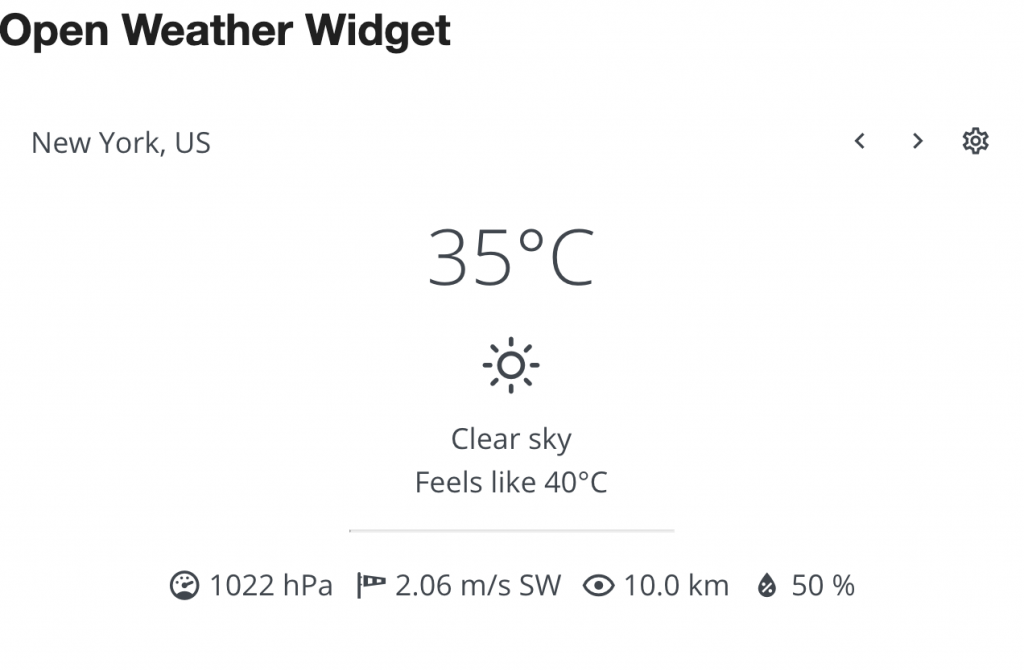
Save the changes and allow the browser to have access to your location. Observe that the weather for your location is now displayed:
Congratulations!
Congratulations, you learned how to create a custom AEM component to be used with the SPA Editor. You also learned how dialogs, JCR properties, and Sling Models interact to output the JSON model.